

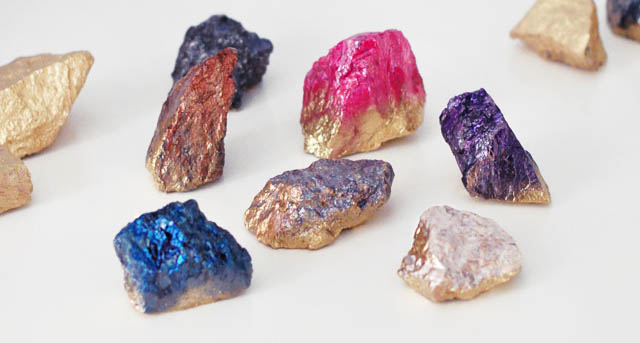
DIY: Make These Faux Crystals Using Nail Polish!

These faux crystals look almost like the real thing, and it’s hard to believe they’re made using nail polish and spray paint! Take a look at how to make your own!
Crystals have been super trendy lately, and the large, pretty ones can sometimes cost a fair bit of money. Not to worry, these faux crystals are made using regular jagged rocks and some paint! Place them anywhere around your home where you’d like a little extra pop of color. Let’s get started on making these gorgeous pieces!
 What You Will Need:
1) Jagged rocks
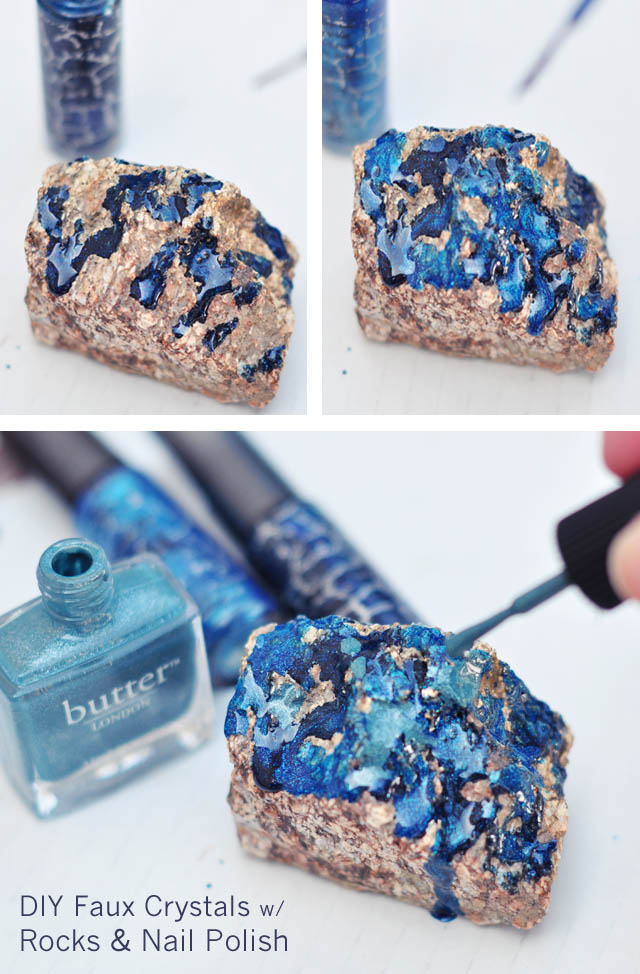
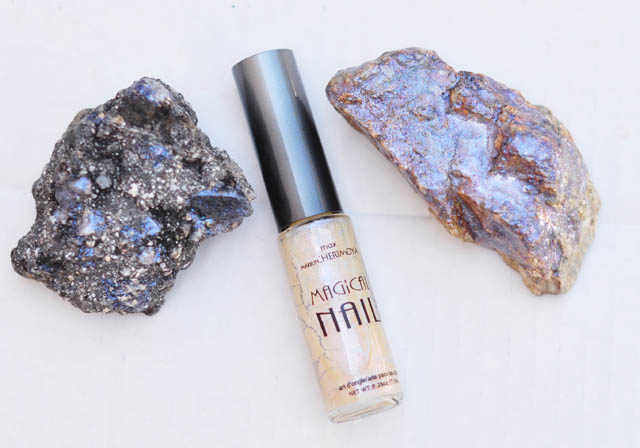
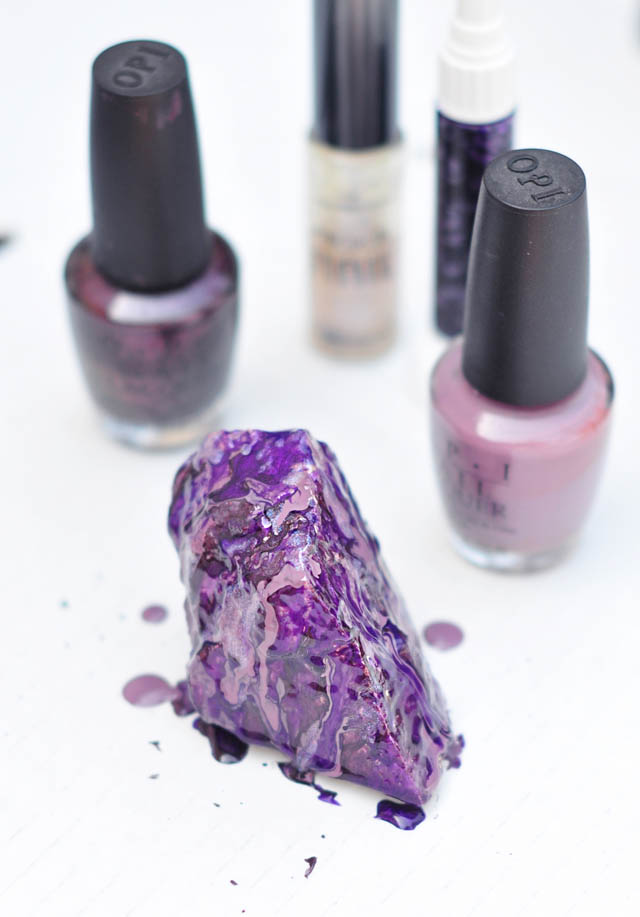
2) Nail polish (use metallics in 3 similar shades per rock)
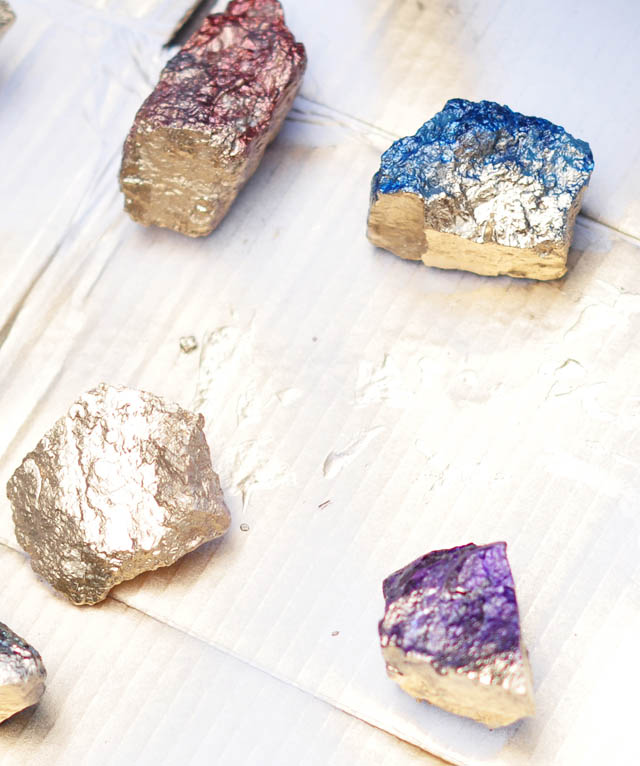
3) Gold spray paint
Step 1:
Wash your rocks to remove any dirt and allow them to dry.
Step 2:
When choosing which rock to paint, set it down and decide which side you want to be the bottom, and which side the top. The side with the most jagged edges will work better as the top, as it will look more crystal-like. Paint the rock starting with the darkest shade of nail polish. While the color is still wet, repeat the same step with the lighter tones. It’s okay if the paint drips all over the rock, that’s the look we’re going for! Allow the rocks to dry overnight.
 Step 3:
When the nail polish is dry, take your rocks outside and place them on a piece of cardboard or newspaper. Spray the bottom and sides of each rock using the gold spray paint.
 Step 4:
Allow the rocks to dry overnight and then place them wherever you like! Aren’t they adorable?!
Photos and idea: Love Maegan.


Leave a Comment