

Brighten Up Your Space with this Easy-to-Make Chandelier
Those gorgeous sputnik chandeliers you’ve been seeing in magazines are perfect for any space. The problem is the high price tag! Here’s how to make your own for only a fraction of the price!
Making your own sputnik chandelier is easy and doesn’t take much time. The best part is you can make it for cheap! Check out this tutorial so you can make your own!
Step 1:
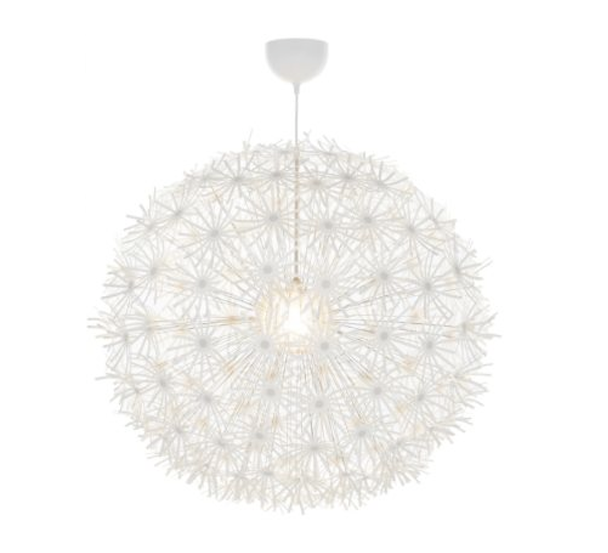
The first thing you need to do is head to IKEA and get yourself the IKEA Maskros chandelier. This will be the base for our sputnik chandelier.
Step 2:
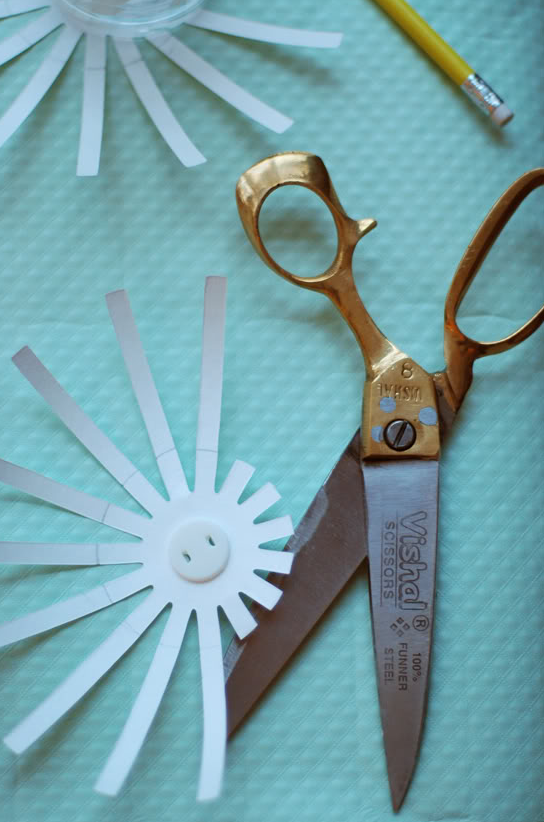
The next step is to trim down the 5″ wide plastic flowers to 2.5″. You can use a plastic cup to trace a perfect circle on the flowers. Then, cut out the flowers.
Step 3:
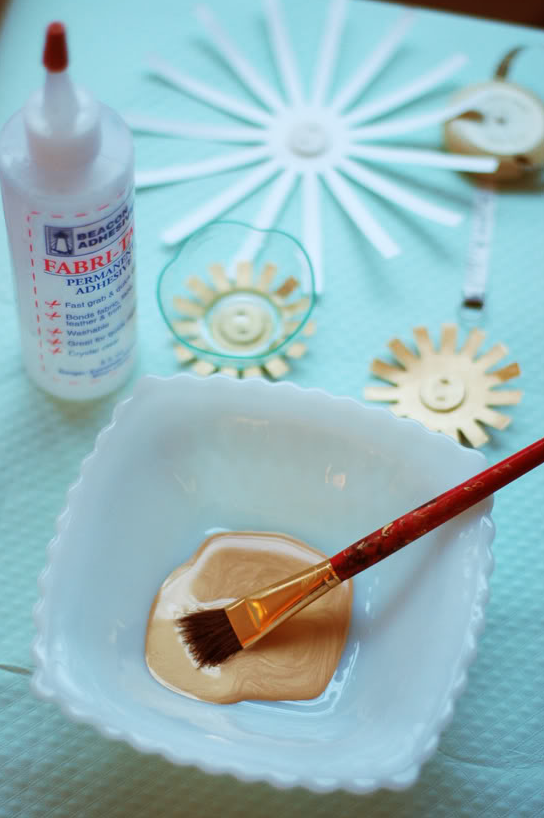
Now it’s time to paint the flowers. In this tutorial, ‘Parlor Gold’ from Ralph Lauren Regency Metallics was used, but you can use any color that fits with your space.
Step 4:
Paint the rest of the fixture, including the cord and ceiling mount.
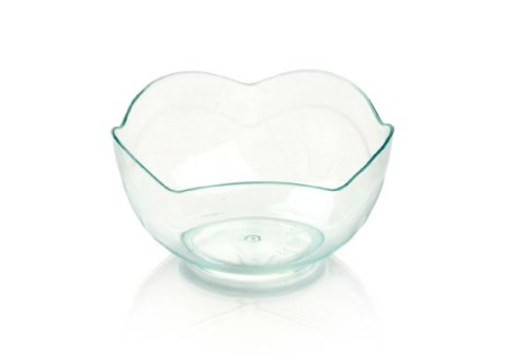
Step 5:
Glue amuse bouche plates onto the flowers. Let the glue dry and attach the flowers to the stems of the chandelier as they were designed to be attached.
 Step 6:
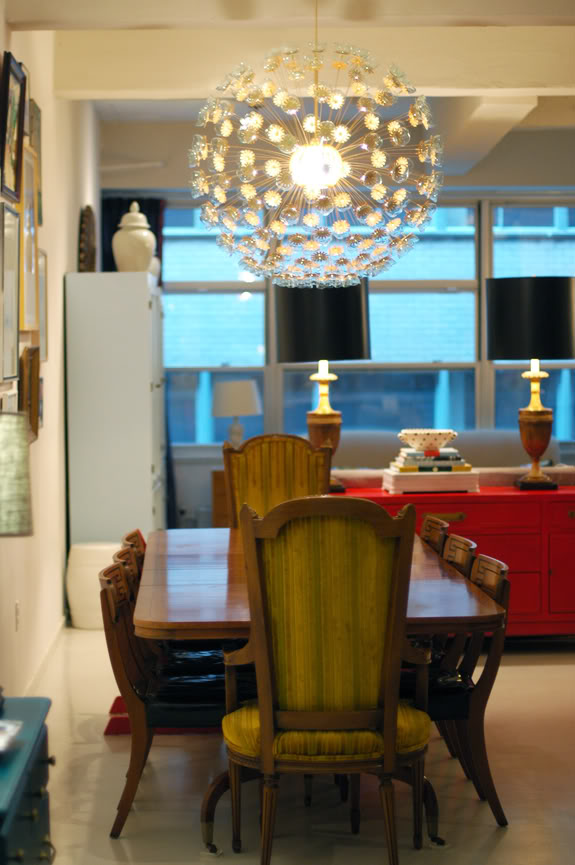
Assemble the rest of the chandelier according to the instructions provided and you’re finished!
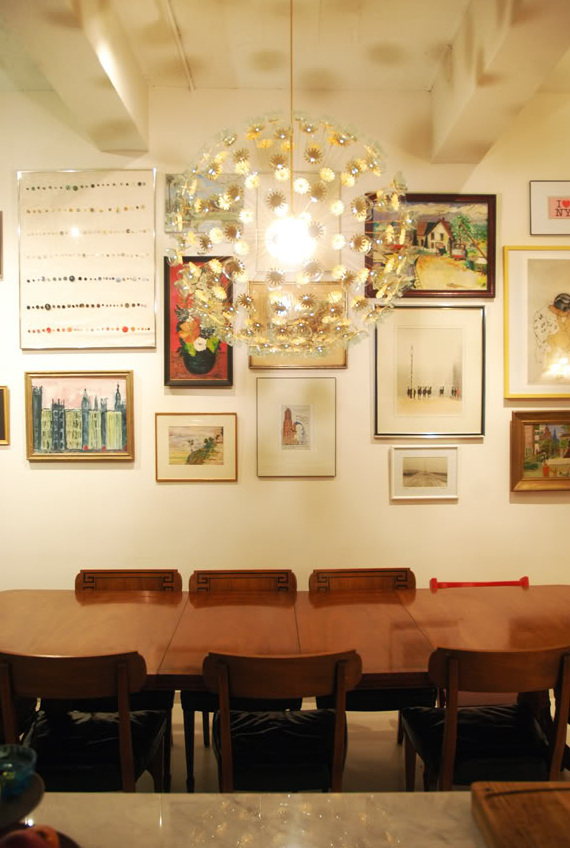
Photos and idea: Little Green Notebook.


Leave a Comment