

Save Money and Pour Your Own Concrete Kitchen Counter Tops!
DIY is all the rage these days, from making your own cleaning supplies, to couch covers, to concrete counter tops… Yes, you read that right! Concrete is gaining popularity due to its cheap price and versatility. We’re going to show you how you can make your own!
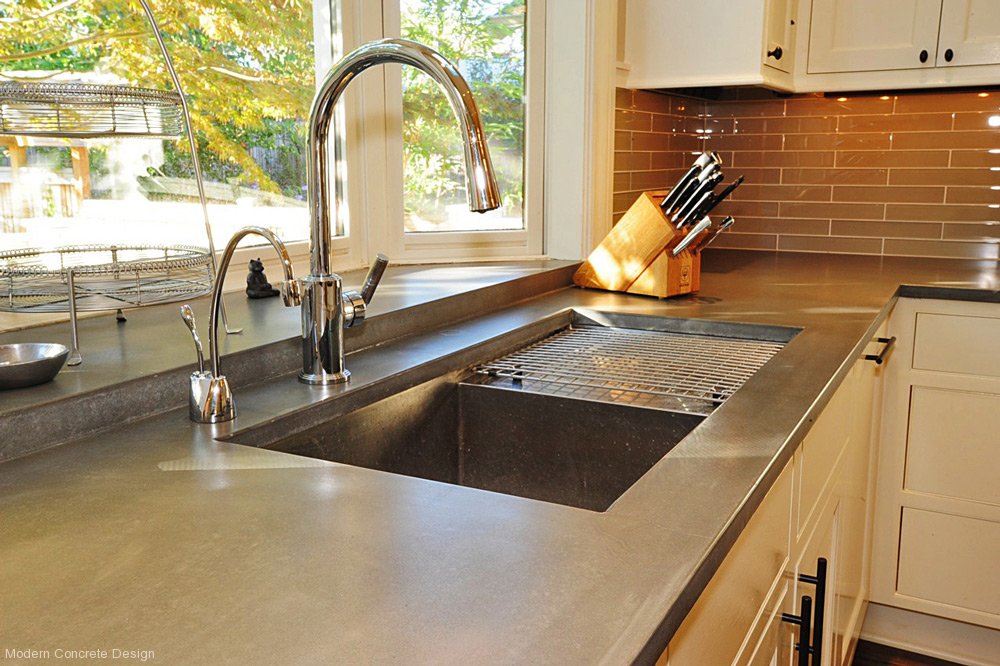
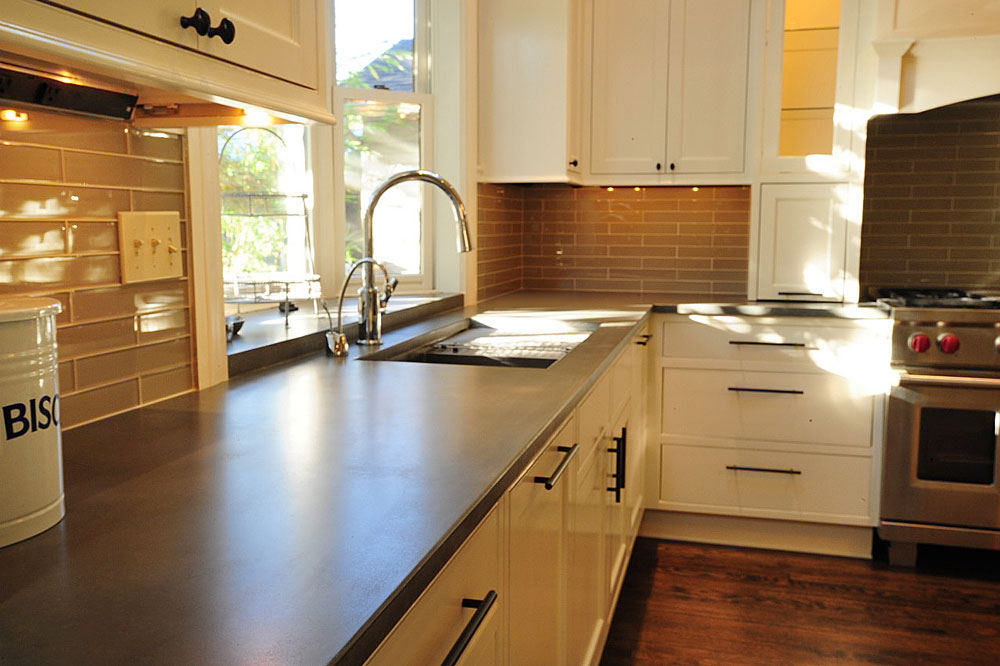
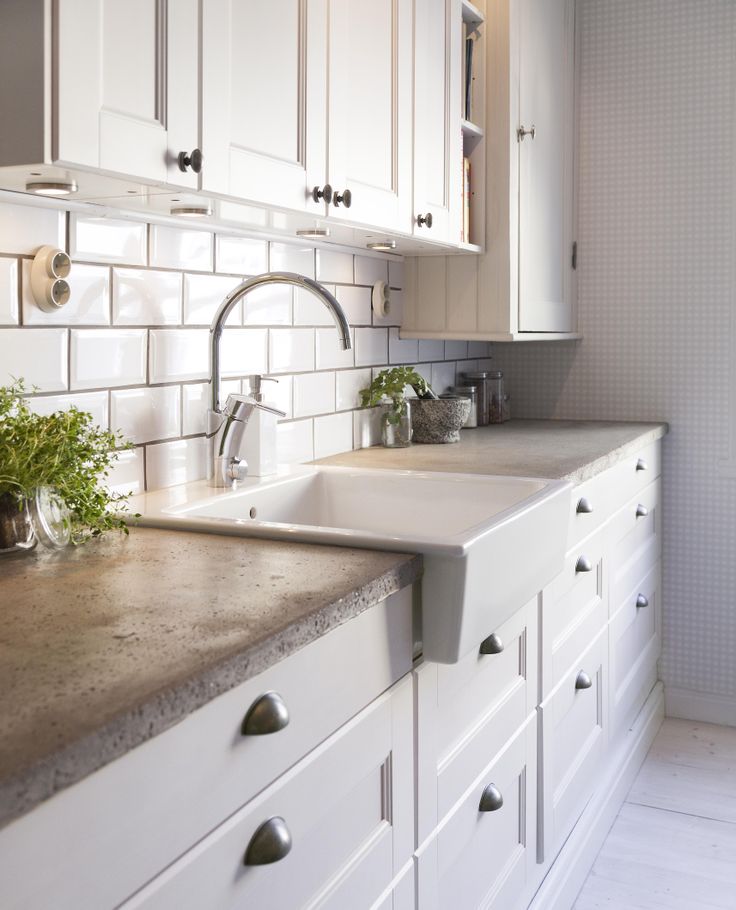
If you love the industrial look, concrete is for you! These days you can make anything out of concrete! Bathroom counter tops, kitchen counter tops, bathtubs, you name it! If you’re wanting to remodel your kitchen, but are on a budget, concrete could be the answer you’re looking for! By making your own counter tops, you’ll be saving money, and you have the freedom to be as creative as you like! Here is a step-by-step tutorial on how you can make your own!
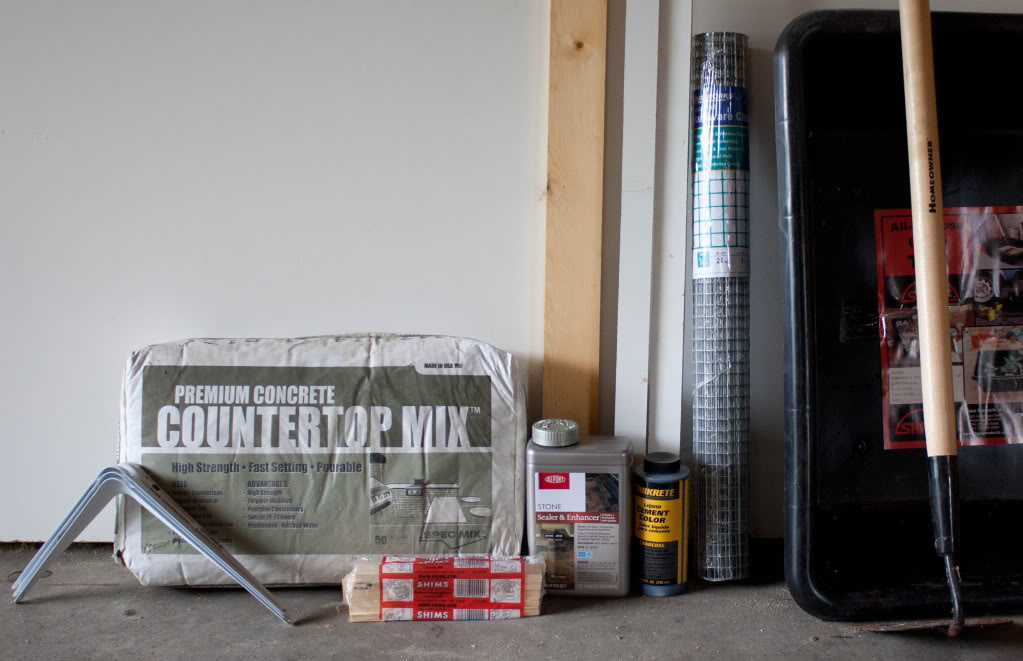
Here’s What You’ll Need:
Supplies:
– 5/8″ Melamine (for making the forms for your counter tops)
– Concrete
– Concrete dye – If you’d like to change the color of your concrete.
– Welded wire mesh – It gives the counter tops more structure.
– Counter top sealer
– Silicone caulk – For sealing your mould corners and sealing your seams.
– 1/2″ plywood – This is the base for your counter top. You need enough to cover your cabinets where the counter top will sit.
– Support brackets – If you plan on having a bar or overhang you’ll need some extra support.
– Water – To mix the concrete.
Tools
– Drill
– 2″ screws
– Caulk gun
– Table saw – You need to make sure your cuts are as straight as you can get them.
– Shims – For leveling your forms.
– Utility tub – For mixing your concrete.
– Hoes – For mixing concrete.
– Trowel
– A board – For skimming your forms.
– Mallet or power sander – For removing bubbles from the forms.
Step 1: Planning
The first step is to make your plan. If you’re replacing existing counter tops, you can measure your old counter tops and pour new ones to match. If you’re starting from scratch, you’ll need to measure the size of your cabinets and overhang. You should plan 1 – 1 1/2″ overhang on the front edges, and 1/2 – 3/4″ overhang on any exposed edges. Edges that are next to appliances have no overhang. Be sure to plan your counter tops around any windows or odd spaces. Once you’ve got your measurements figured out, you need to decide where to put your seams, like at corners. Making seams is especially helpful because you need to carry the counter tops to the kitchen, and pieces that are too big can snap in the middle.
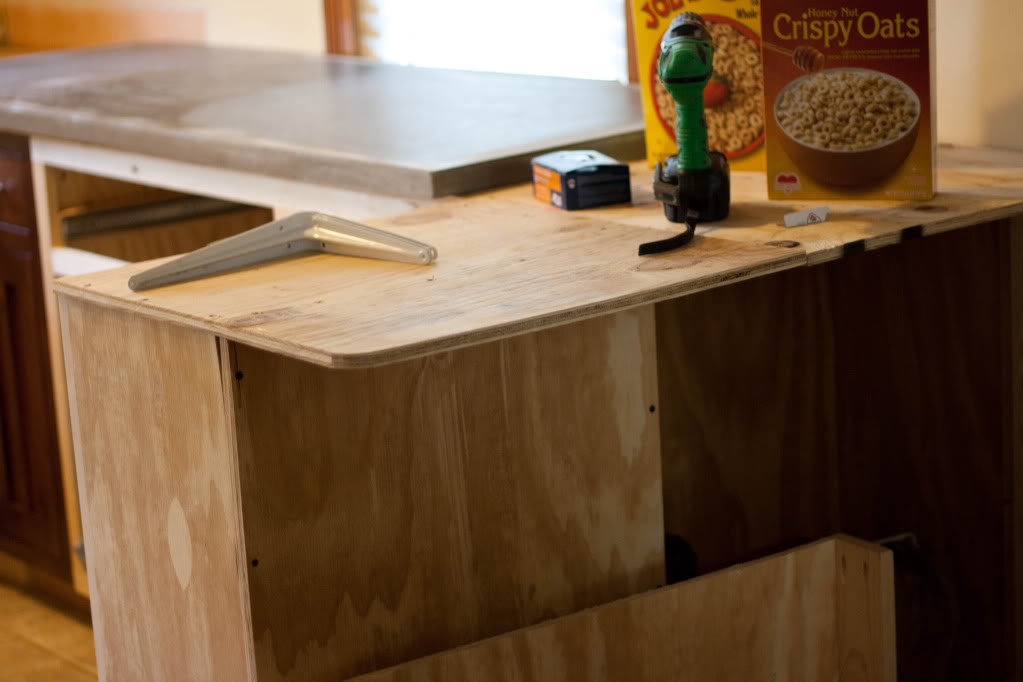
Step 2: Prepare the Cabinets
You need to put down a base layer of plywood before you install your counter tops. Cut the plywood to sit flush with the edges of the cabinets so they won’t show under the lip of the counter tops. If you have a bar overhang, cut the plywood 1″ short. Secure the plywood by screwing it onto the frames of the cabinets. You also need to check if your cabinets can support the weight of the concrete. They must be made of plywood, not thin particle board. If you’re creating an overhang, add your support brackets.
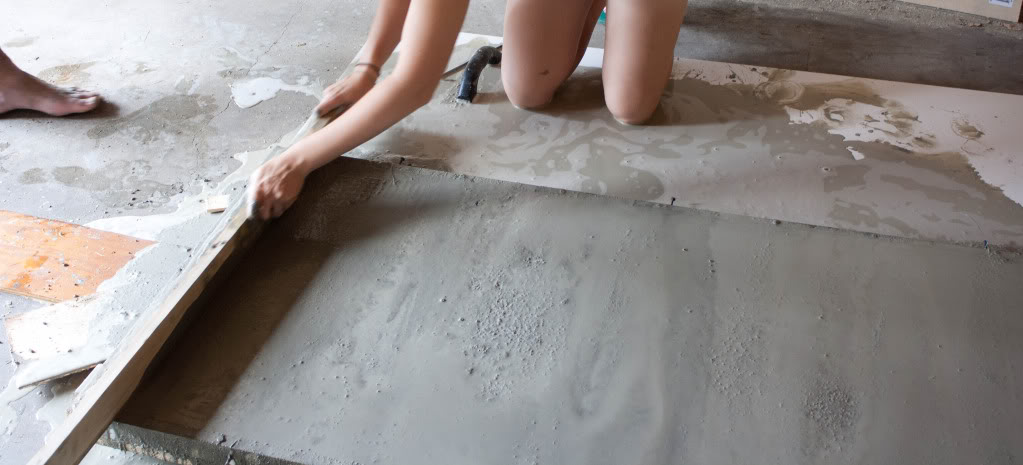
Step 3: Build the Forms
Your forms should be built out of melamine, as it is a non-stick surface. When you pour the concrete, the bottom side (the side against the melamine) will be the top. The melamine will give it a smooth finish. You’ll also need narrow pieces of melamine that you can cut up and use to make your form sides. It’s also important to get your form base level. You need to find the most level spot to work on (try your garage).
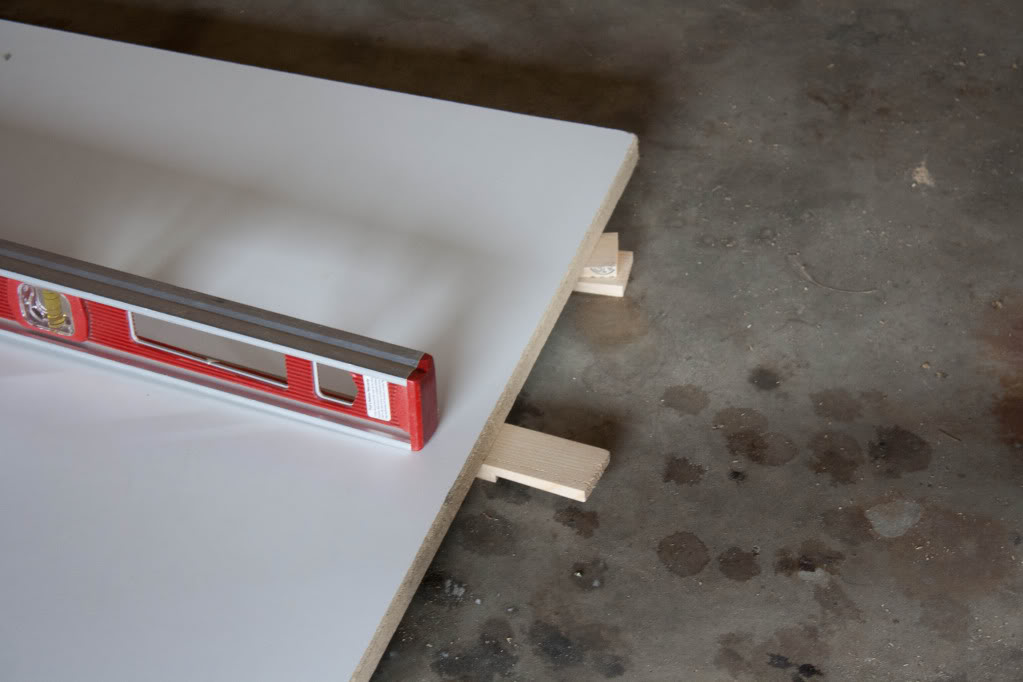
Next, you need to cut strips for your form sides. Using a table saw, cut the narrow melamine pieces into 1 1/2″ strips. A standard counter top is 1 1/2″ thick, but you can pick any size you like. Make sure you build your forms upside down from your measurements. The bottom of your form will be the top, and you need the piece to be the right size when you flip it over.
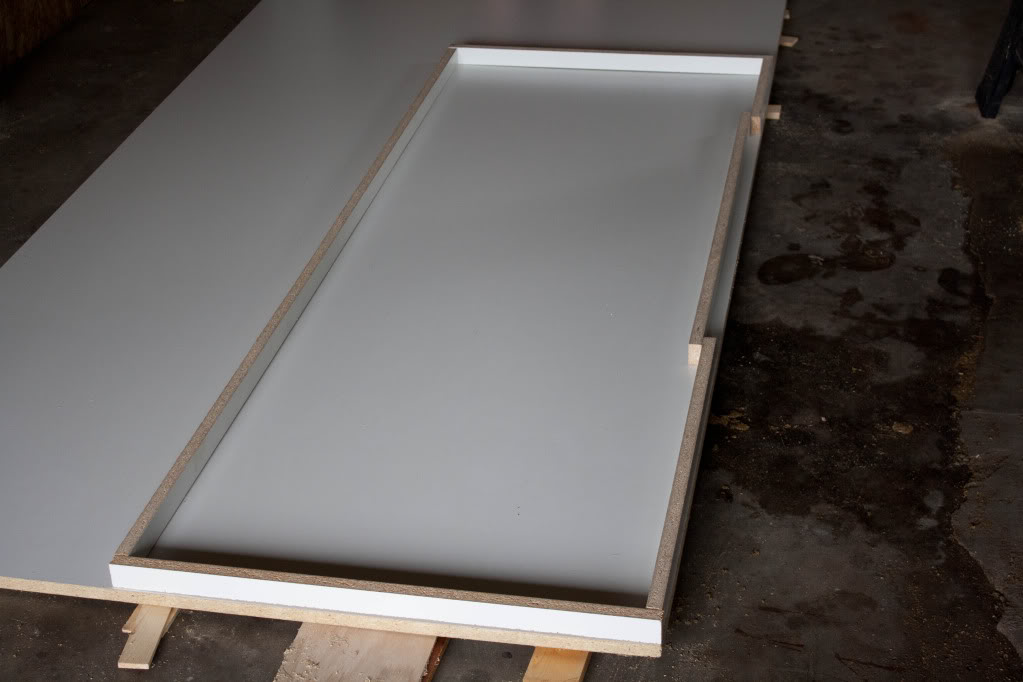
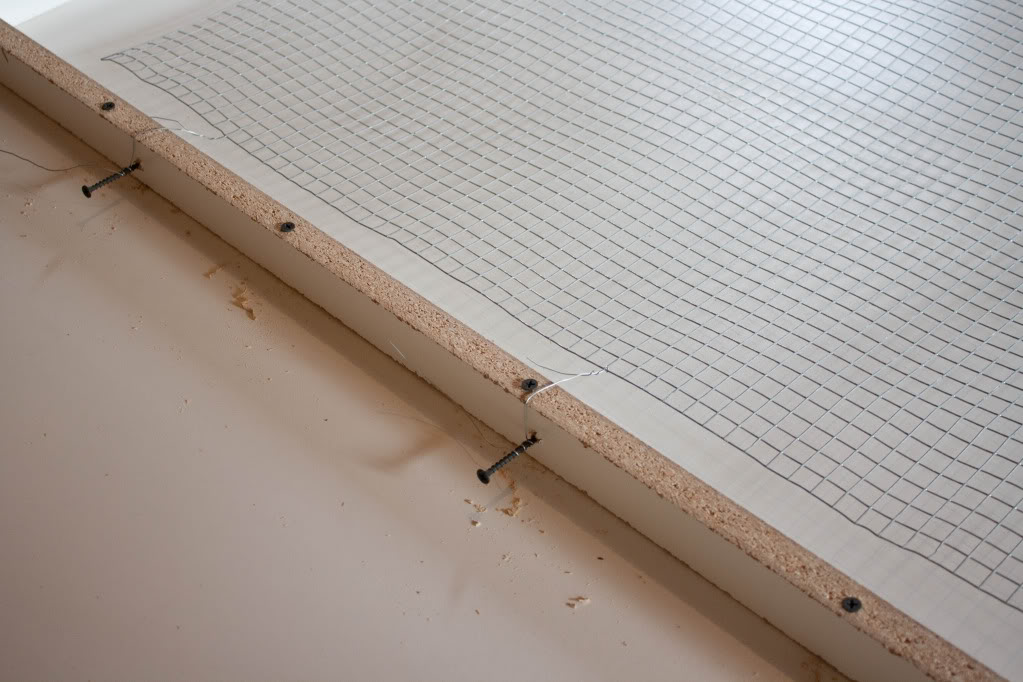
Now you need to attach the melamine strips to the base of your form. Drill pilot holes through the sides, then screw them down with the 2″ screws. Once all the sides are secure, caulk the seams around the bottom and corners. You should use 100% silicone for this. Caulking the seams keeps the concrete from seeping out and creating messy edges. If you’d like to create rounded corners, use a rounded tool to shape the caulk to the shape you want. As for the wire, you need to choose a mesh that’s firm, but soft enough so you can flatten it. Cut it about 2″ from the edges of your counter top. When you’re pouring the concrete, fill the form halfway, then place the wire. This prevents the wire from sinking to the bottom and poking out of your counter top.
Step 4: Mixing and Pouring the Concrete
Mix the concrete according to package directions. Add in the concrete dye if you want your counter tops to be a different color.
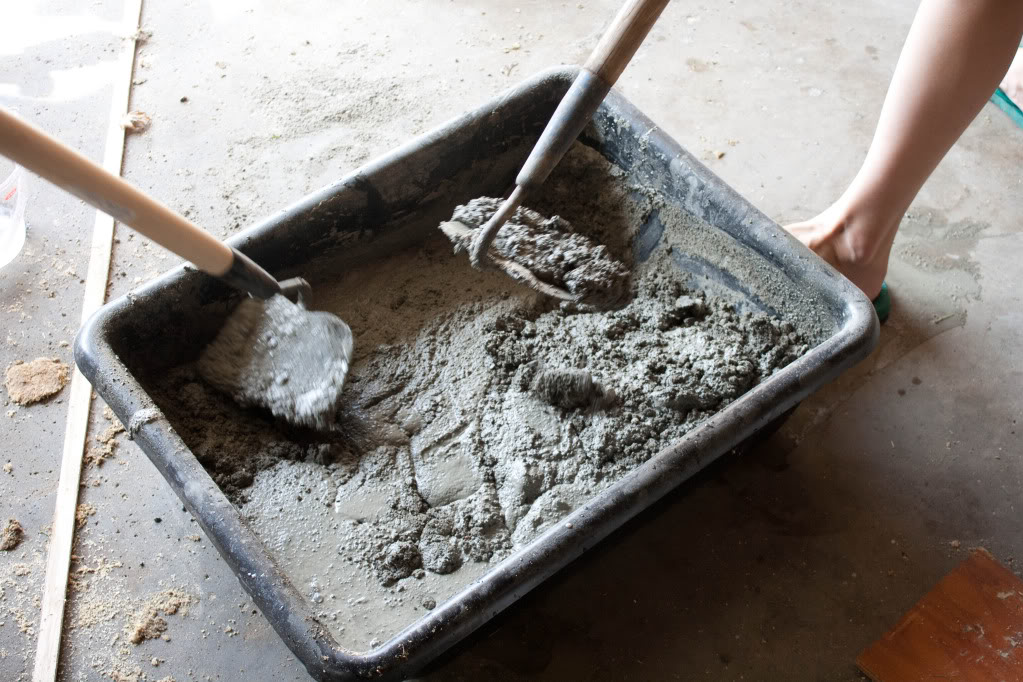
When your concrete is mixed, it’s time to pour! Remember to add the wire after you’ve filled the form halfway. Work quickly so that the concrete doesn’t set before you’re done. After each batch of concrete you pour into your counter tops, use the belt sander to vibrate the edges of the form to release any bubbles. If your concrete has bubbles, when it dries the bubbles will turn into holes. When your forms are filled, use a board to skim across the top to get it as smooth as you can. Slide the board from one end to the other.
Step 5: Removing the Forms
Let the forms dry and cure according to package directions. Once they have dried long enough, loosen the screws and pull them away. Don’t pry against the cement because it’s still soft enough to be scratched.
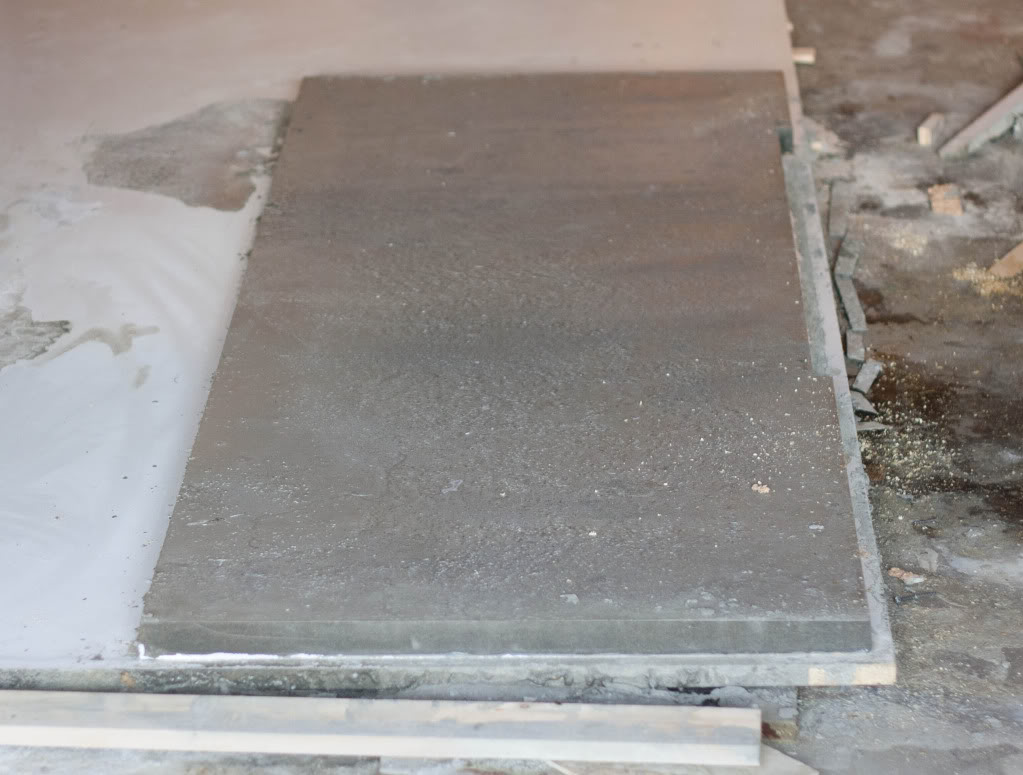
If you want, you can use an adhesive on your plywood base before you put your new counter tops on top. Make sure you do this before anyone lifts up the counter, because it’ll be heavy! Carry your counter tops into the kitchen and slide them in place.
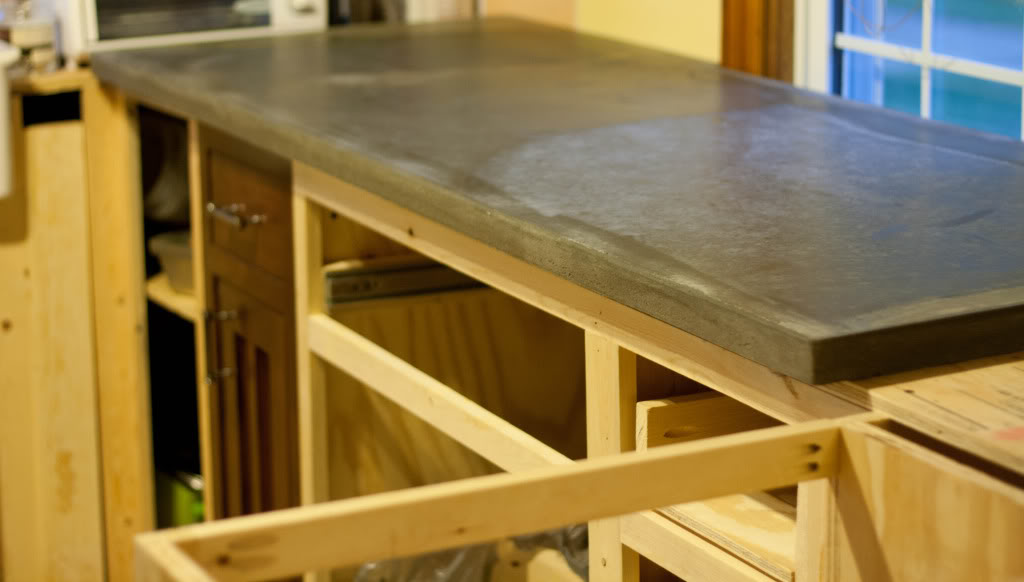
As soon as possible, sand down your counter tops. You need to do this before the concrete cures and it’s still soft. When the concrete hardens, it’ll be extremely difficult to sand it down. Allow the concrete to cure for a few days, and make sure that you don’t touch it! It’s still soft and any pressure on it can leave a mark.
Step 6: Finishing
After the concrete has cured, it’s time to seal it. Sealing the counter top will make it stain proof and waterproof.
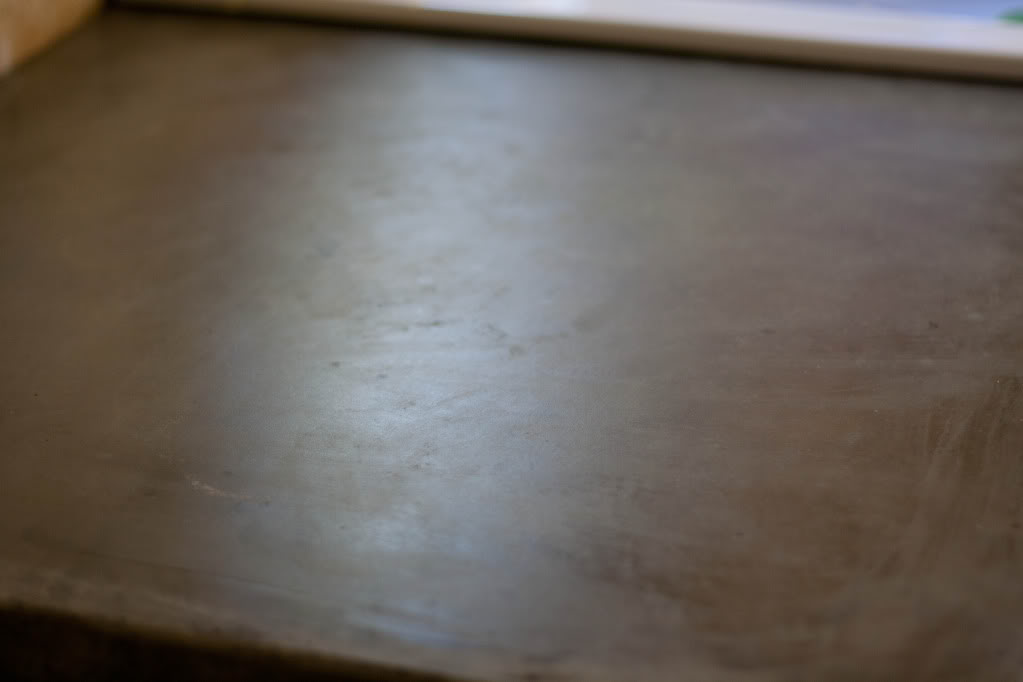
Now it’s time to seal the seams. Use clear silicone to fill the seams in the corners, and around the sink. That’s it! Now you’re finished! Stand back and admire your hard work!
Photos and idea: More Like Home, Kover Krete, Caroline Cabrera.


Your concrete counters look fabulous!! How are they are holding up for you??